


 The Modern Rustic Fireplace Design – Using Reclaimed Barn Fireplace Mantles
 The Modern Rustic Fireplace Design – Using Reclaimed Barn Fireplace Mantles
A seasoned farmer once told me that when the roof is compromised and starts leaking or sheeting blows off the rest of the structure will follow in time. Bad news for the barn… good news for those of us who want a piece of history in our living room, dining room or den, right?
So lets take a few minutes to deal with the 3 most common questions we get about rustic barn beam mantles…
What is involved in finishing them?
How do you mount it safely?
How much will it cost?
We’ll take a look at each of the points briefly and explain how we do it so you Do-It-Yourselfers can be better prepared to tackle one of these projects yourself and those of you who ask us to do it have an appreciation for the work involved.
So What is Involved In Finishing Reclaimed Barn Beam Fireplace Mantles Anyways?
Power-wash off the caked-on debris
Dry thoroughly
Wire brush off the loose wood and scale
Sand all surfaces
Adze the butt ends
Seal and clear coat all surfaces
After we make our visit to the folks we get our supply of beams from and get them back to the shop we usually start with a pressure wash if there is a lot of mud and debris on them which is sometimes the case. After that they get a nice warm spot on the heated floor for anywhere from 2-3 weeks to a couple months depending on how wet they are when they come in.
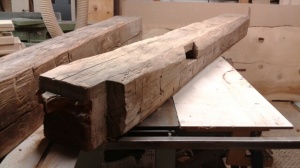
Once they are ready to work with we choose the beam according the tastes of the client. Some want a lot of character with pockets, mortices and tenons. Others prefer a cleaner look without all the historical joinery in view. Both are usually available options.
Next up is the wire brushing of the entire beam to remove loose wood, oxidized wood and debris and to soften harsher details that would detract from the overall look. This step is pretty intense and will often remove much of the silver-grey exterior but is necessary for any protective coating to bond to the wood mantle correctly and last for any length of time as well as stand up to things being put on it.
After we have the cleanup with the wire brush completed we sand the entire beam to soften the surface so its smoother to the touch and easier on clothing that come into contact with it. Edges and corners get slightly rounded and cracks and crevices get all the remaining dirt and junk blown out of them.
The final step before applying the clear coat is to adze the butt ends of the beam. 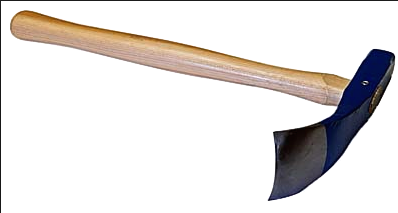 This gives it a mo
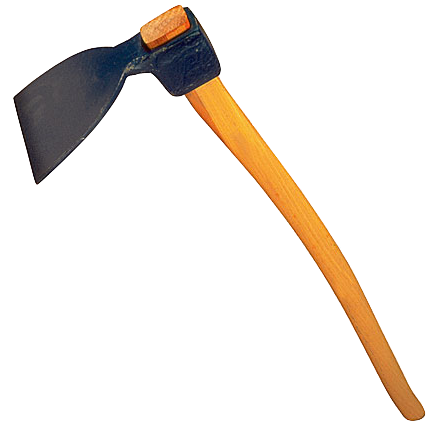 re relevant finish surface than a clean saw cut especially on the hand hewn beams we primarily use since the adze was one of the tools used in its original shaping.
While the flat adze was used primarily to make the straight sides of the beam along with a broad axe we use the curved adze to create small cupped cuts for a larger dimpled look that just has a more aged and authentic feel.
After this step has been completed we are ready for the sprayed on finishes. First, a sealer then a light sanding which for all intents and purposes c’cuts’ the hairs that are raised up from the seal coat. Then 2-3 top coats are applied with a light sanding between each coat.
Simple, right? Well much easier when you have the right equipment and tools but completely doable if you are adventurous and have some time. So on to the next step.
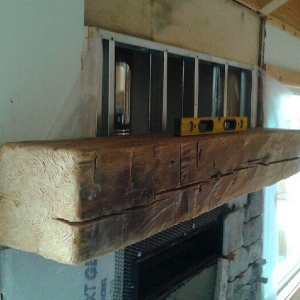
How Do You Mount A Heavy Beam Mantle Safely
And With Confidence That It’s Not Gonna Fall?
Choose french cleat or lag through the wall
Check manufacturers recommended height from fireplace opening
Install your wall plates and hang the mantle
Of course there are a few ways of mounting the mantle safely to the wall. We use 2 main ways. One is the french cleat system and the other is lagging the mantle from the back of the wall.
Before you do any kind of work on the mounting itself you must always check the manufacturers recommended distance for combustible materials from the fireplace opening and follow it. This is an important matter since the insurability of your home in the case of fire could be adversely affected if you ignore this step. SO DON’T IGNORE IT, Please…
French cleats are basicaly 2 strips of wood or plywood with a 30-45 degree cut on each piece. 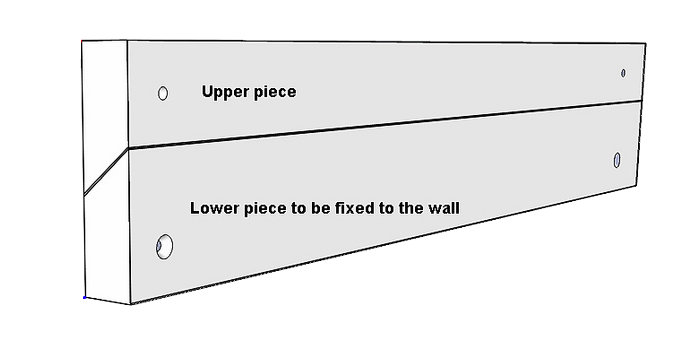 One strip gets mounted to the wall with the angle pointing up and out. The other strip gets mounted to the mantle with the point down and away from the mantle. Once these 2 pieces engage and have the weight of the mantle forcing them together it becomes very, very sturdy. If the strips are mounted securely there is no reason this will ever move. We usually add some peace of mind by shooting some 5” wood screws through the 2 pieces from the top to ensure there will be no movement unless the screws are removed.
If the wall that the mantle is being mounted on is open and we have access to the beam from inside the wall we will often choose to mount the mantle using lag bolts from the inside, through the wall and into the back of the mantle. You can use a layer of plywood or 2 which are screwed to the wall studs. We also use a length of 2×6, 2×8 or 2×10 instead of layers of plywood. Either way works well and can be used with confidence.
There are a couple things to keep in mind when choosing your mounting method. For the french cleat system you will need to insert spacer blocks at the bottom of the beam that will push out the bottom and thus keep the beam face level. Also be sure that your cleat system won’t move the beam too far forward and in front of the surrounding stone or wall cladding of your choice. Lagging the mantle to the wall is the preferrable method if you need to hug the wall more closely.
If you are hiring a stonemason to do the wall cladding then make sure your installation won’t interfere with his schedule either as a professional courtesy.
So whats all this going to cost?
How Much Is This Going To Cost?
We have found that the raw costs of the beam itself can vary a lot. We supply the beams cut to size for the do-it-yourselfer in a few different dimensions. We can get 6×6, 8×8, 9×9, 10×10, 10×12 and 12×12.
Using 10×10 as an example since its by far the most common size we install, our last mantle was 78” inches long and came in at $292. The whole thing installed came to $1182 including working on the beam itself and necessary construction onsite for a local contractor.
The work was completed in 2 days and we worked around the stonemason’s schedule so they weren’t interupted.
Pricing given here is to be used as an example and not a swet linear foot price as that cannot be set in stone but if you were to ballpark using the numbers shown you could get a general idea of the basic costs.
So I hope this has helped out a bit to explain whats involved in the steps to take the raw product and do the various treatments to create a finished product. Of course there will be unexpected variables that come up but I hope you send us an email or give us a call if you get stuck.
We are here to help out if we can.
Contact us by email or phone about your project
Follow Us – See Whats New


